Help
Please select a category below for more information. Hopefully you'll find everything you need right here, but in case you have any other queries please email admin@mymobilityhub.com.
Click Register on the navigation bar to register to use MyMobilityHub
Registration requires that you enter the following information:
- Email address - Required for email correspondence, e.g. registration, booking confirmations, password resets.
- Display name - The name that will be displayed to identify you, e.g. email correspondence, leaderboard. This can be anything you chose - your name, initials, shortened name, nickname, etc
- Password - A password made up of at least 6 and a maximum of 100 characters long with at least one non-alphanumeric character, and at least one lower and one uppercase letters
You will receive a confirmation email once registration is complete. Please click the link within it to confirm your email address. If you do not see the email please check your spam and whitelist the sender.
NOTE: Before you are able to logon to MyMobilityHub, your registration will be reviewed and approved by the MyMobilityHub Admin team. You will receive an email confirmation once your registration has been activated.
Once your registration has been approved your are then able to Login using the email address and password you registered with.
Click the Forgot your password? link if you have forgotten your password. You'll need to provide the email address you registered with to reset your password. An email will be sent to your email address with a link to provide new password credentials.
If it is the first time you've logged on to MyMobilityHub or you are yet to save your profile, you will be prompted to make changes to your default user profile.
The user Profile page is made up of three sections:
- Avatar - Create your own avatar from the pre-set options. Simply choose the colours for skin tone, hair colour, shirt colour, hair type and toggle beard on or off. Your avatar will be displayed on the leaderboard.
-
Plan settings - These settings assist you when creating a plan, and directly influence what journey options are displayed.
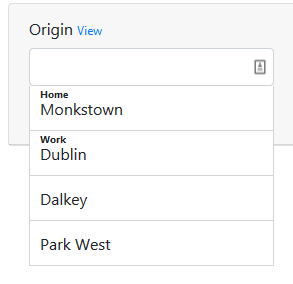
- Home and work location allows you to select your default locations to use when making a plan. Setting Show search history on input will allow you to select either location as well as any alternative locations you have searched for previously.
-
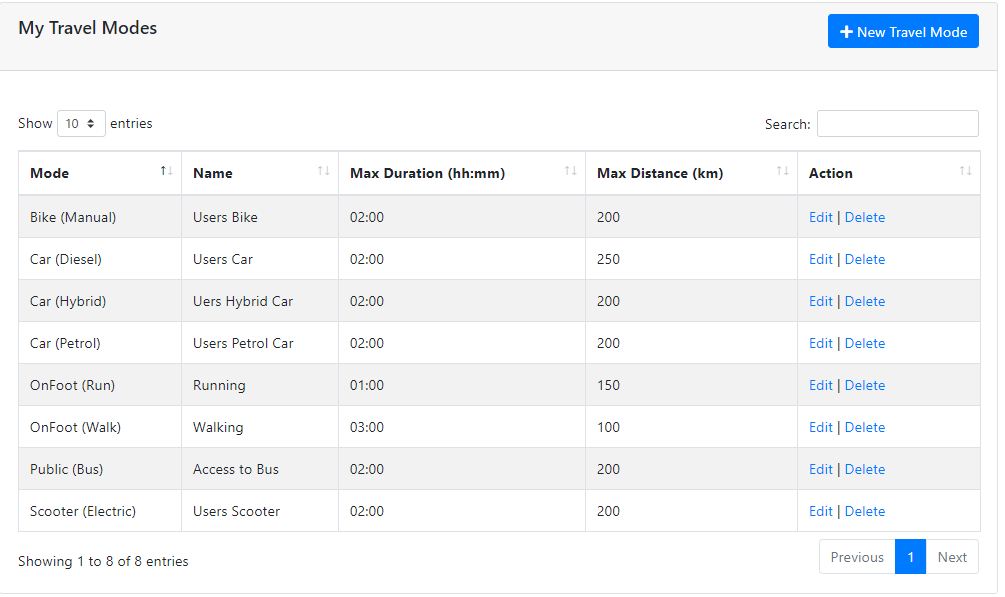
Travel Mode - Allows you to add the type of resources you have access to use when making a plan. The resources can also be modfied and deleted.

-
Add Resource
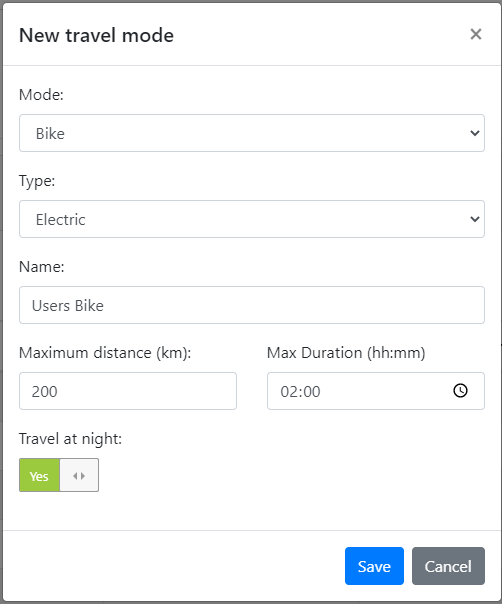
- Lists different types of resource, select the option that you have access to - List different types of fuels, select the option that matches with the resource that you have access to. This will show the selected resource result if a valid resource travel journey is found - Give it a name of the resource that you have access to - Enter a value for the maximum distance you would prefer to travel in kilometres. Journey options further than this value will be excluded from the available options - Enter a value for the maximum travel time you would prefer for a journey option. Journey options that are longer than this value will be excluded from the available options. - For users that do not want the journey plan to show travel options during the hours of darkness.
- Home and work location allows you to select your default locations to use when making a plan. Setting Show search history on input will allow you to select either location as well as any alternative locations you have searched for previously.
- HR Profile - This section is only available for Administrators but is visible to the user. It shows a list of all HR profile options that allow a user to select a particular journey option. For example, a user may be required to complete a safety course that would allow an eBike journey option. Alternatively, if the user has a driving endorsement, a driving option or booking of eCar would not be possible.
If journey options are not available due to these settings, the plan will return a message stating User profile skills/policy does not allow booking of this resource
The Account page allows you to manage your account preferences. Here you can modify your display name, change your email address and reset your password.
Click Plan on the navigation bar to plan an appointment and see the journey options available.
The search box requires you to enter your origin, destination, appointment start date and time, and appointment end date and time. Clicking view next to origin and destination labels will open google maps to show the associated location.
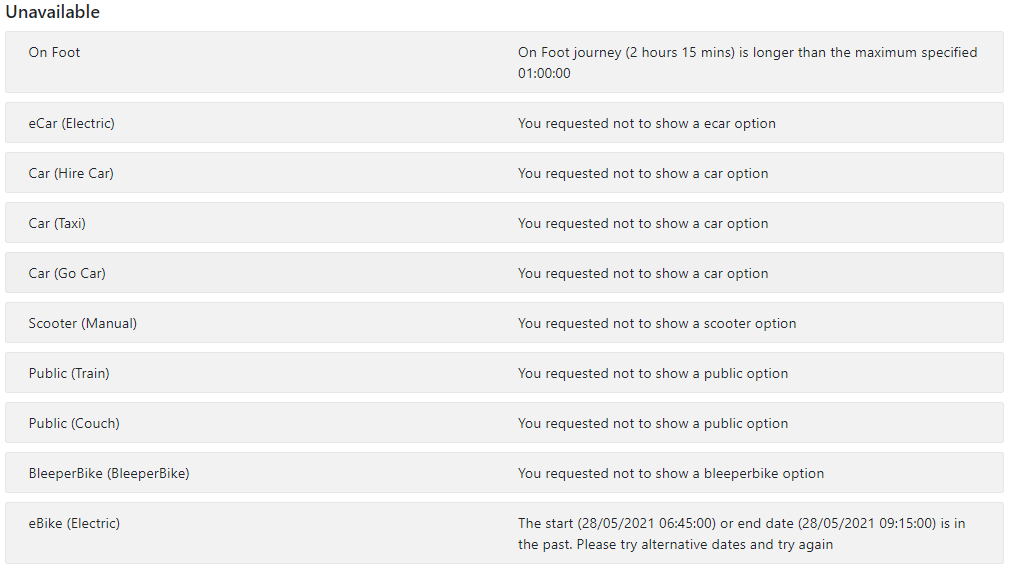
All possible journey options depending on your user profile and HR profile settings will list under the heading Available. Any journey options that do not comply with your user profile or HT profile settings will list under the heading Unavailable.
All listed journey options can be sorted by distance, duration or number points by clicking the relevant header.
Below is an example of travel mode settings.
Below is an example of an appointment and journey plan options.
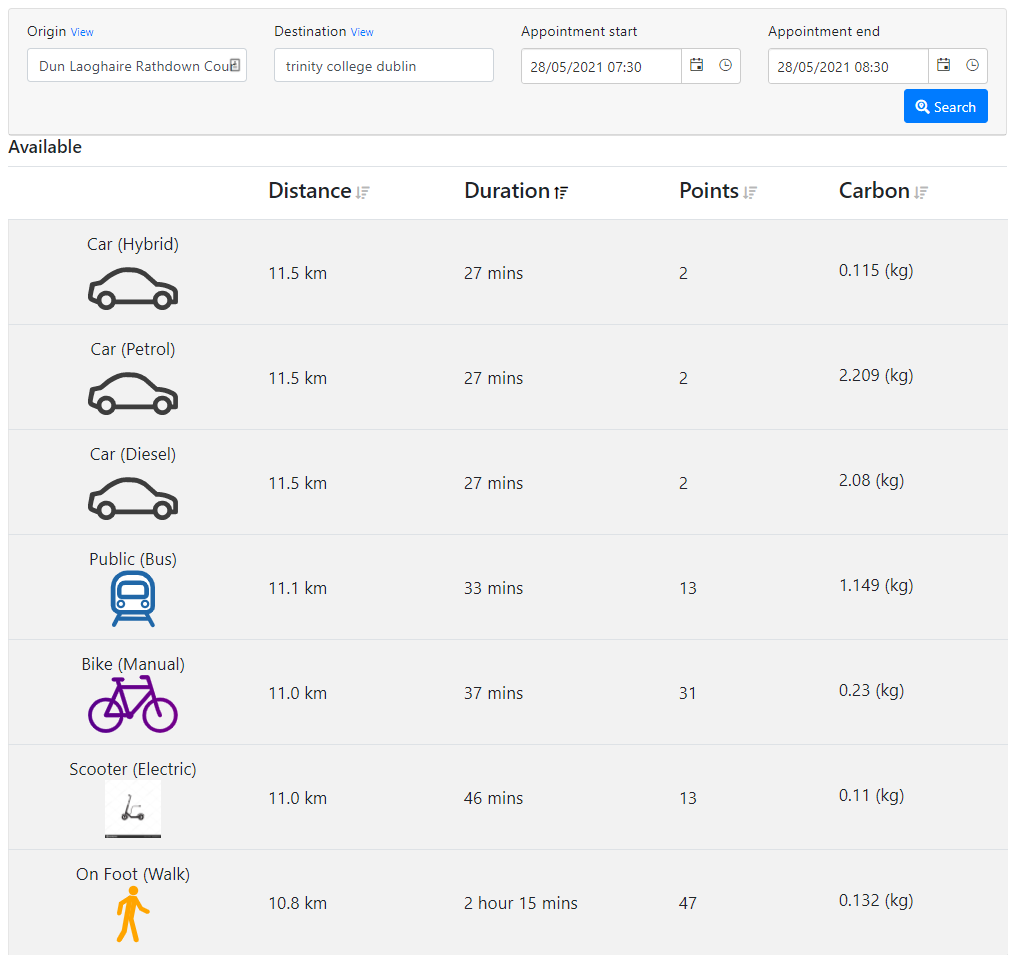
Points & Carbon add a gamification aspect to the journey planning process, and allow users to gain points for selecting options depending on the following example:
| Journey option | Base points | Extra points per km | Carbon |
|---|---|---|---|
| Walking (Walk) | 25 | 2 | 12.2 |
| Walking (Run) | 27 | 2 | 10 |
| Cycle (Manual) | 20 | 1 | 1 |
| Cycle (eBike) | 15 | 0.5 | 22 |
| Public (Bus) | 10 | 0.25 | 103.9 |
| eCar | 6 | 0.1 | 60 |
| Car (Diesel) | 2 | n/a | 181.084 |
| Car (Petrol) | 2 | n/a | 192.294 |
To view the journey plan click one of the available options listed. a window will appear giving an overview of the appointment and journey, a map showing the journey route and a step-by-step guide.
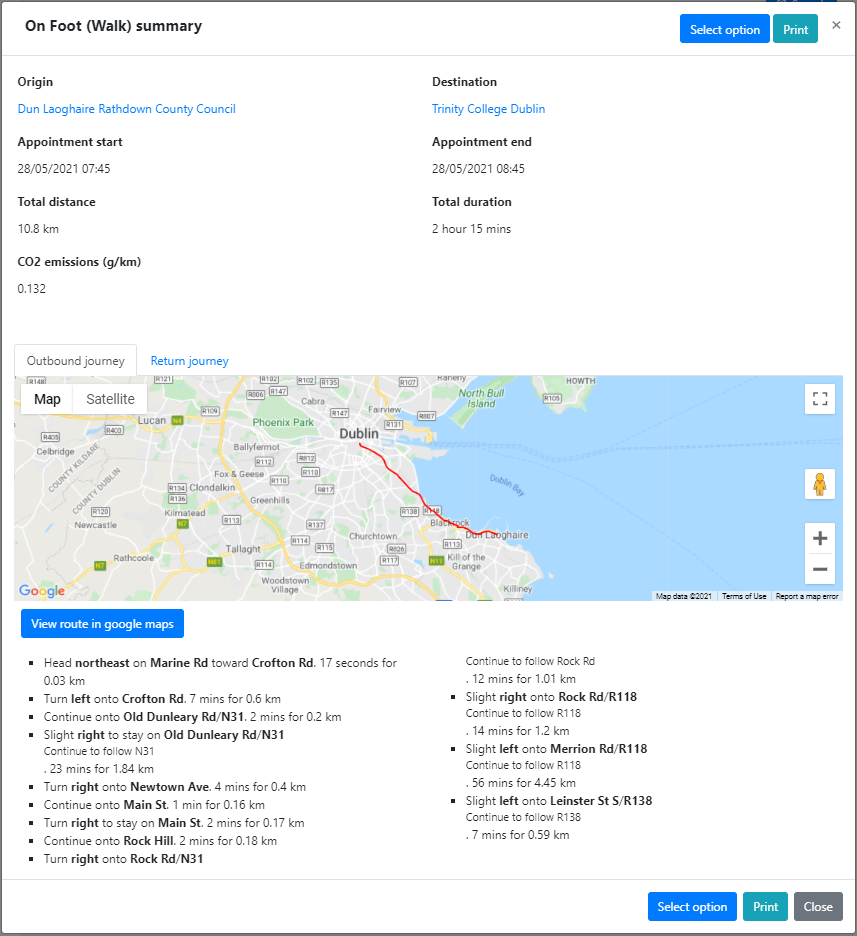
Click the View route in google maps button to open the map externally in google maps.
Click the Print button to print the summary.
Click the Select option button to show your intention that the journey summary is the option you have chosen to proceed with. Doing so will log your intent and add the associated points to your profile.
Once your intention has been logged you will receive an email of your plan summary. If the option you selected was for an eCar or eBike, you will be redirected to the booking page to complete the resource booking, otherwise you will receive a notification window.
Resource booking allows you to book an eCar or eBike. Doing so will show your booking on the My bookings page, and reserve the resource from being booked by another user during that period.
You have two options to make a booking:
- Booking through the planning process, or
- Manually booking without a plan
Booking through the planning process
See the Journey planning guide above to view how to create a plan and select a journey option. As stated previously, if choosing an eCar or eBike option, you will be redirected to the booking page to continue your booking.
The booking page will show the associated plan summary and booking resource pre-selected. The start and end booking date and times take into account the duration of the journey to give a realistic option for booking. Any options on this form can be amended to suit.
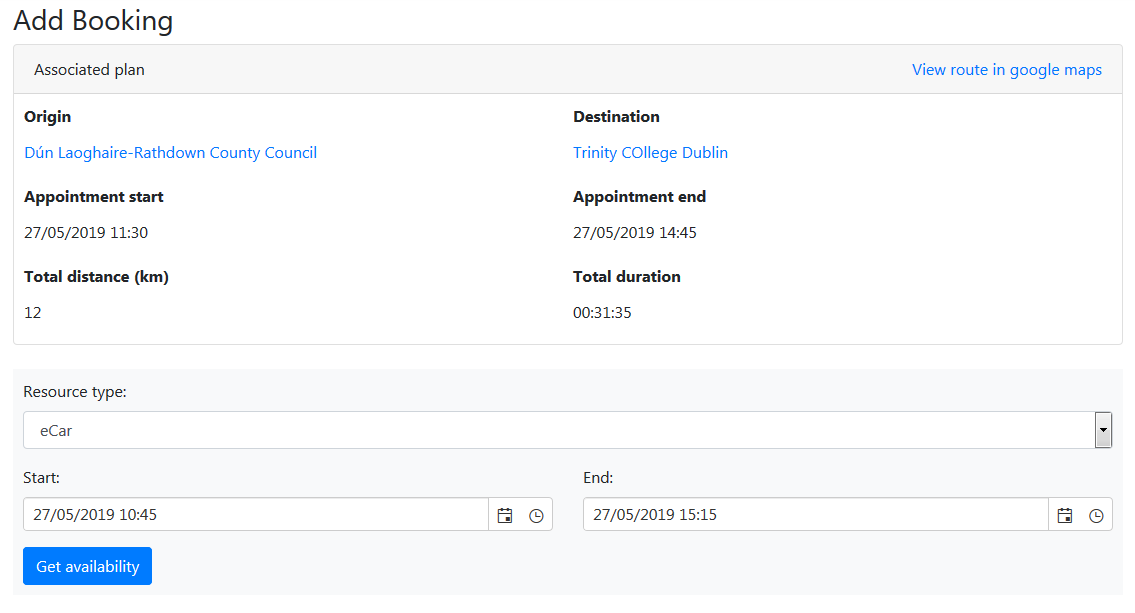
Click Get availability to view the available resource for the options selected.
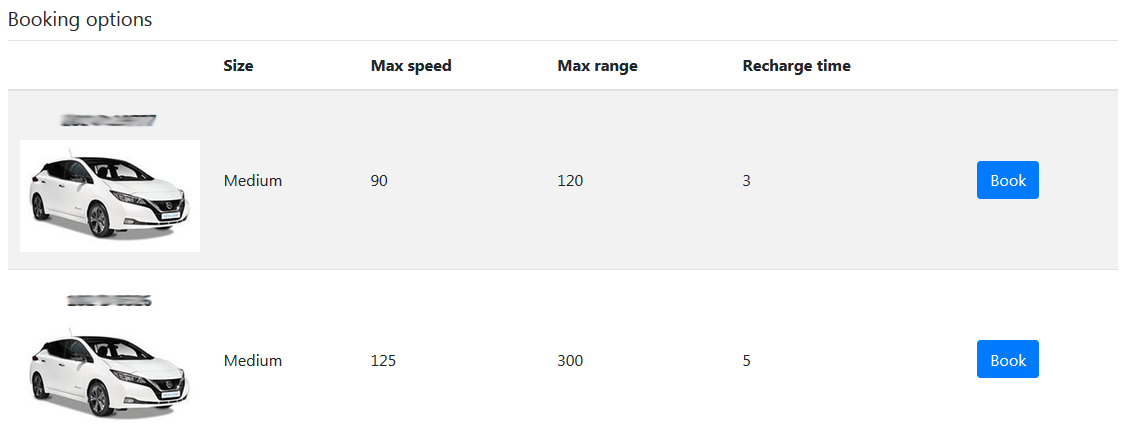
Click Book on a resource to make the booking. You will then receive a popup notification and email confirmation quoting your booking reference, and you booking will appear on the My bookings page
Manually booking without a plan
Click My bookings to manually create a booking without a plan. Then click the Create booking button.
Select the resource type, start and end date and time and click Get availability
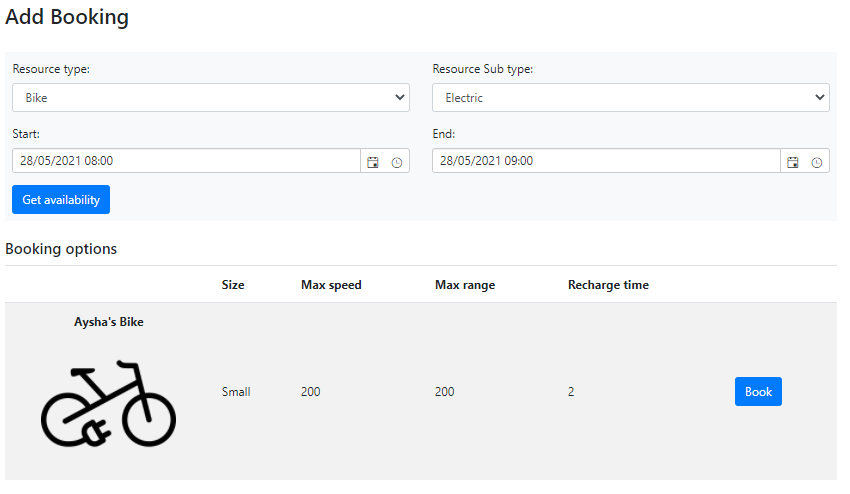
Click Book on a resource to make the booking. You will then receive a popup notification end email confirmation quoting your booking reference, and you booking will appear on the My bookings page

| 24/05/2019 |
|
| 06/06/2019 |
|
| 27/05/2021 |
|